How We Hold the Club
Communication is a huge factor in the ability to teach the game. As golf teaching professionals, we have the knowledge and of course the secret to our success is our ability to impart that knowledge. There are many moving parts to the golf swing, but, the least practiced and the most important is how we “hold” the club. Notice how I’ve used the word “hold” and not “grip.” Grip conveys the feeling of tightness; hold conveys the feeling that you should “find the club, feel the club and allow the hands to work.”
As Tommy Armour once said, “If I could give only one golf lesson for the rest of my life, and the pupil could stand the pain, it would be how to hold the club.”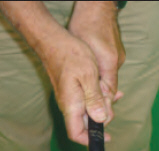
Let’s keep this simple. There is only one way to hold the club, the correct way, and remember, comfortable is not always correct.
I have my students working on two things only when practicing how to hold the golf club, placement and pressure – the “2 Ps!”
Some key words that can help your student find the correct hand position, without using any technical terminology could be as follows:
• Target hand – “Knuckles not nails.”
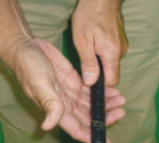
• Non-target hand – This hand goes on the club, not und er, not over, but on.
• Both hands – “Non-target hand hides the thumb of the target hand” (in other words, the target thumb fits in the cleft of the non-target hand. Simply put, “hide the thumb.” Some teaching analogies for grip pressure are not so simple for the golfer to understand, for example:
• “Squeeze a tube of toothpaste” – Would that not depend on how much was left in the tube?
• “Holding a telephone” – Would that not depend on who you were talking to?
• “Holding a baby bird” – How many of our top coaches have held a baby bird? I know I haven’t!
 How soft should we hold the club? Imagine holding your child, grandchild, any “wee” one’s hand as you are crossing the road. You would not hold it so tightly that they would
  be in pain nor would you hold it so loosely that they could run away!
If we can imagine a grip/hold pressure scale, say one to ten, one being little or no pressure and ten being the tightest, we should encourage our students to aim for 3-4 at address, and remember, a hold of 8-9 at address will be 19-20 at impact, and we all know the hands would not be able to work.
Always grip at chin level, and with the club in this position, practice writing your name with the club head, concentrating on only using your hands.
One of the qualities of being a successful teaching professional is having an open mind and to always be willing to learn. I have had tremendous success by listening, learning, experimenting and finding simpler ways to teach “placement” and “pressure.” If there are simpler ways, please let me know.
Teaching aids and simple terminology can help our students learn how to hold the club properly each time. Here are some examples of teaching aids that we can use:
• Target hand – Yardstick/ruler/umbrella.
• Non-target hand – Briefcase, handbag, attaché case, suitcase.
• Both hands – Turn the club upside down and take your hold just above the hosel (still cylindrical but more manageable when learning the hold).
As a teaching professional for many years, I have noticed that the written word can be as destructive as the spoken word. It is not what we teach, but how we teach it. My teaching is not the gospel, but I have many followers and am always learning how to improve my skills and help all my students progress.


